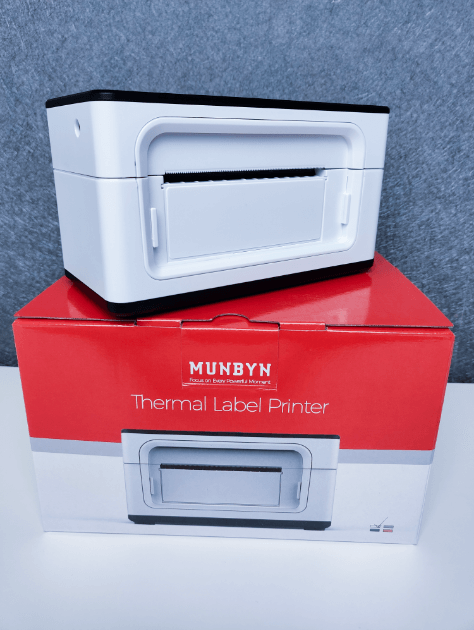
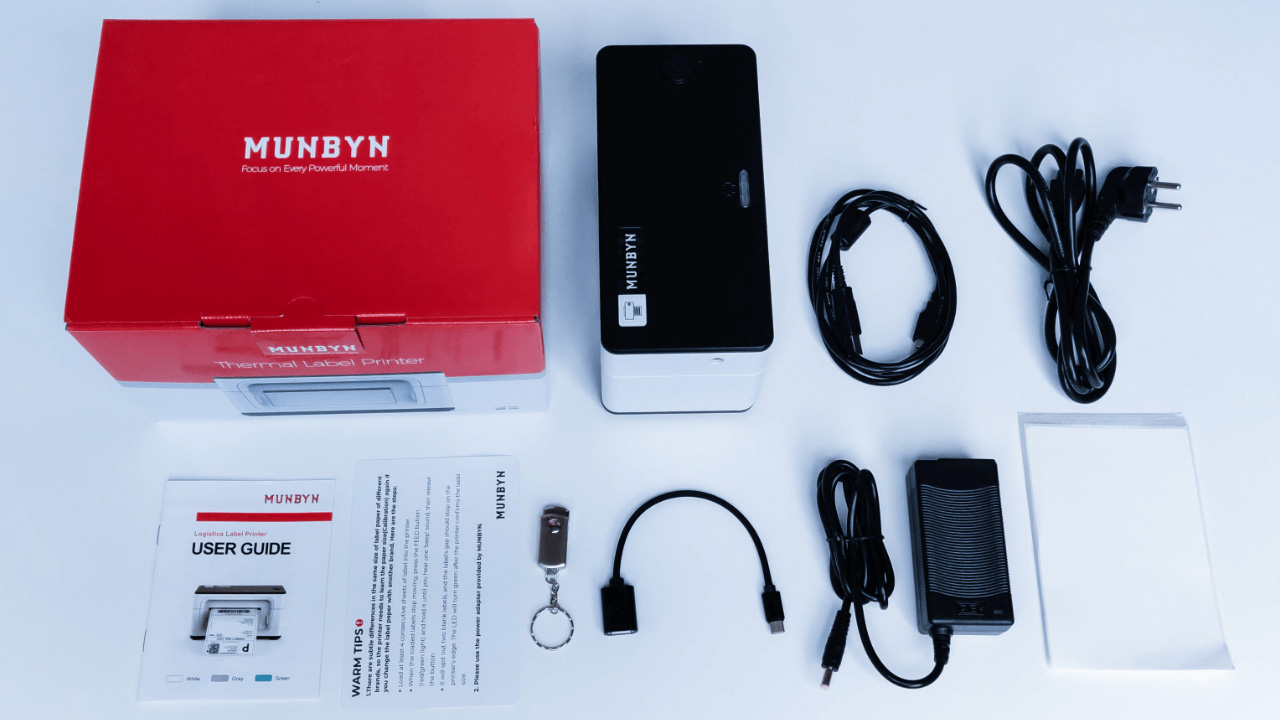
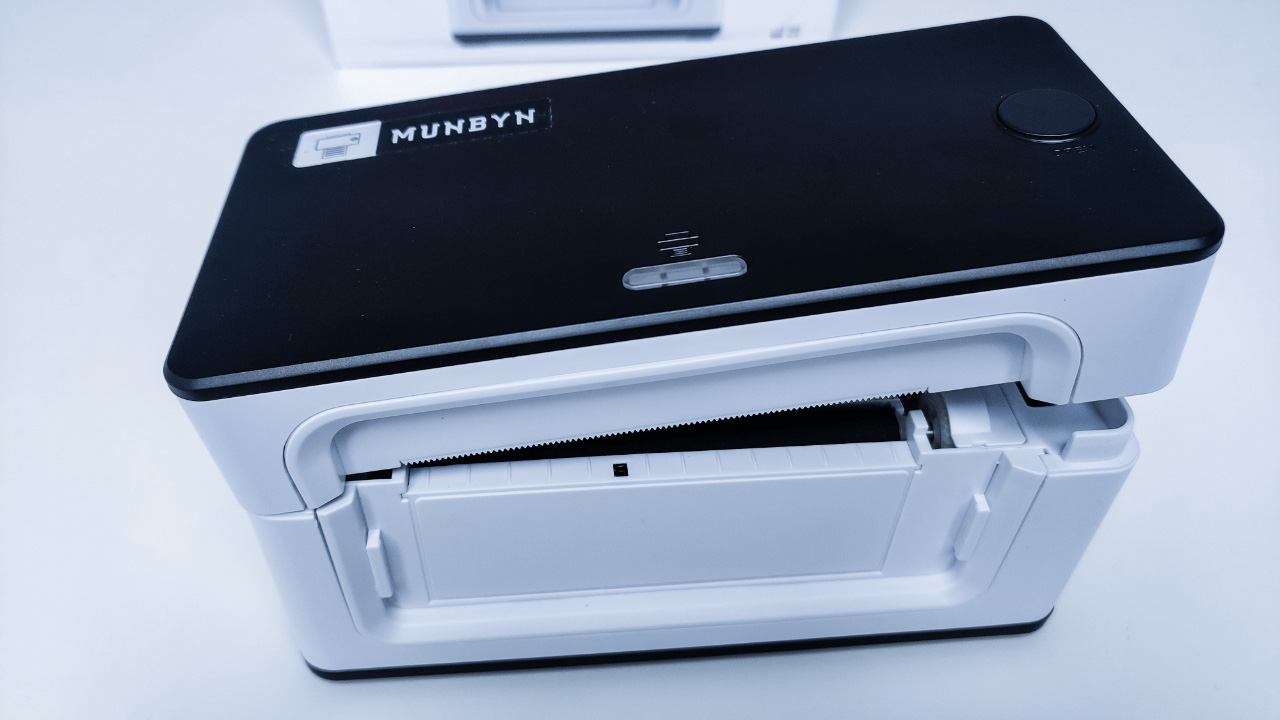
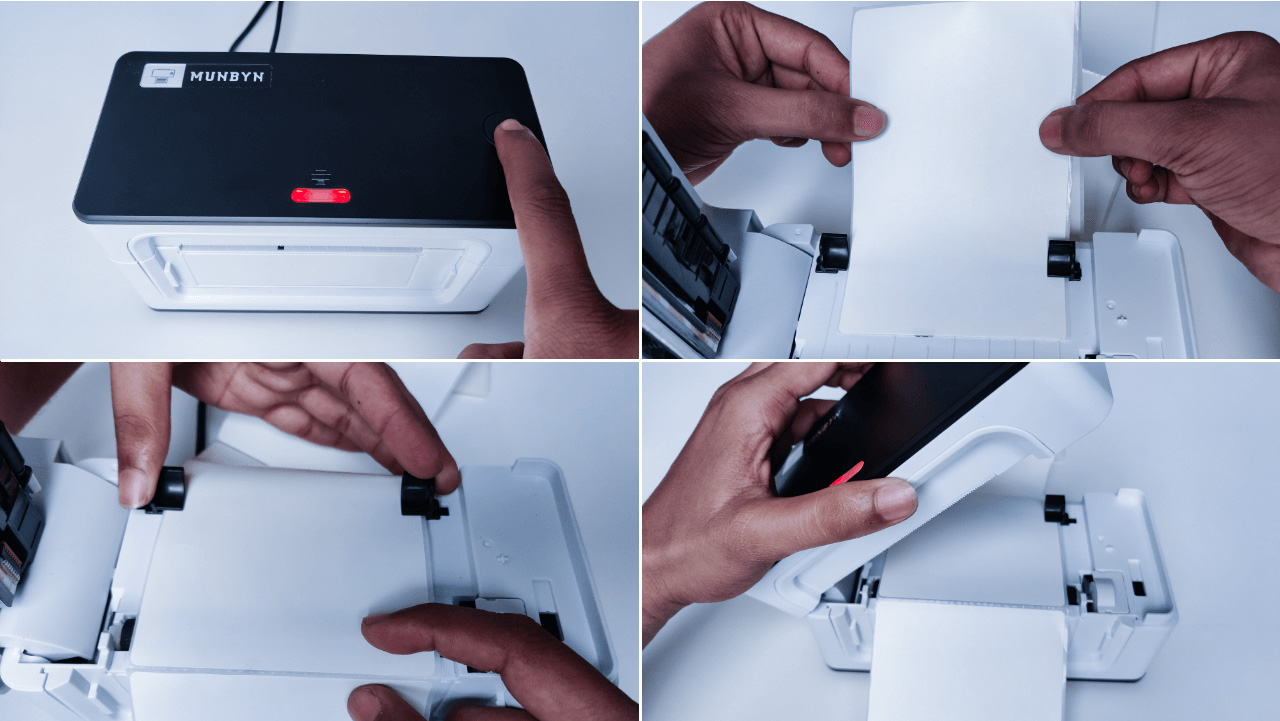
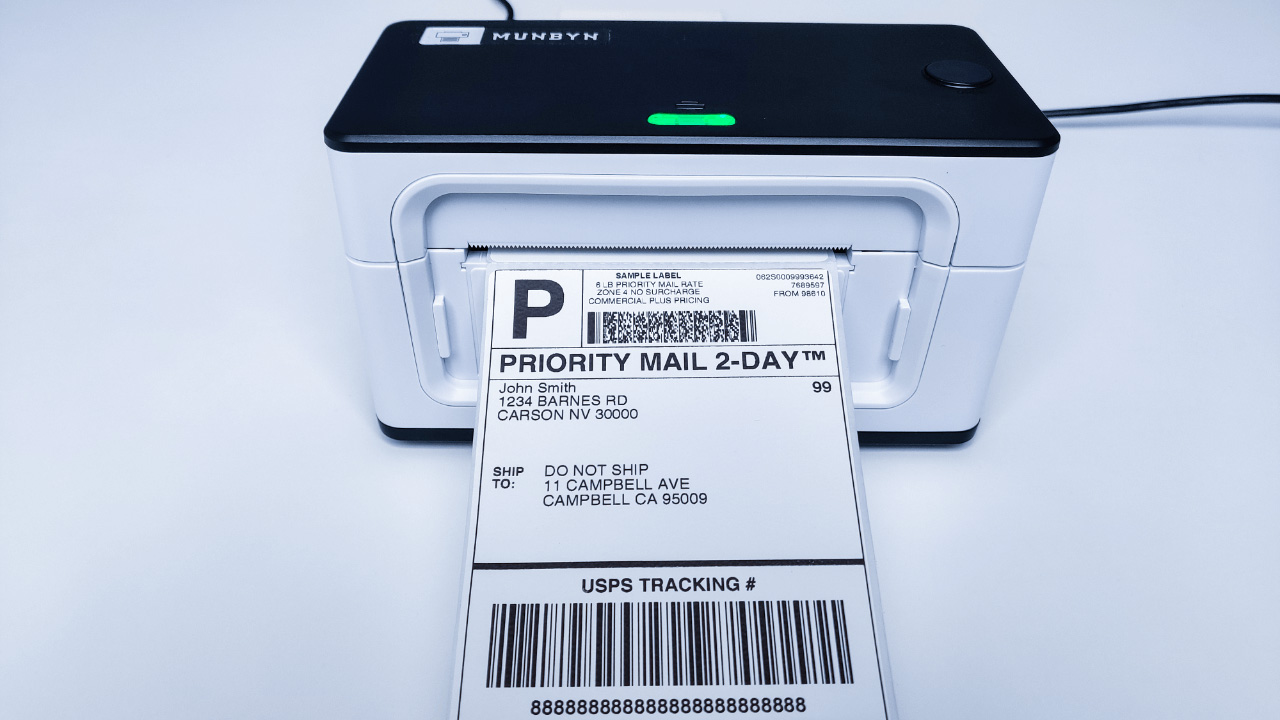
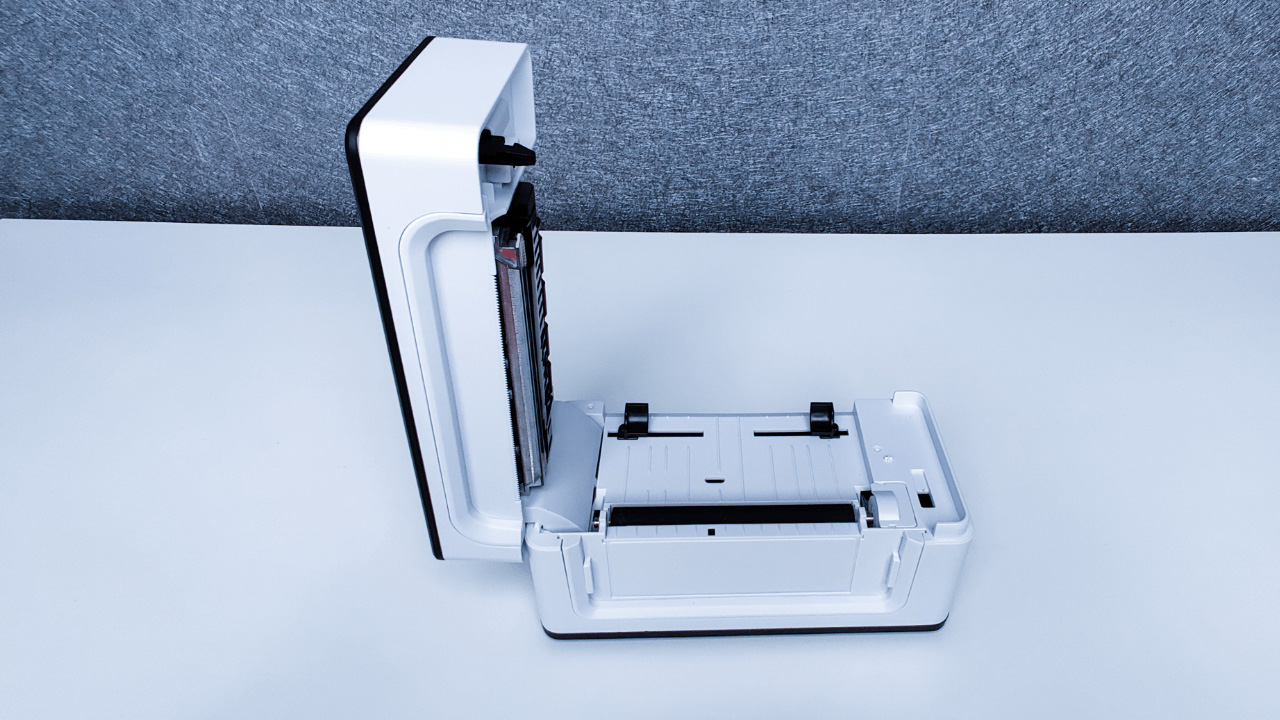
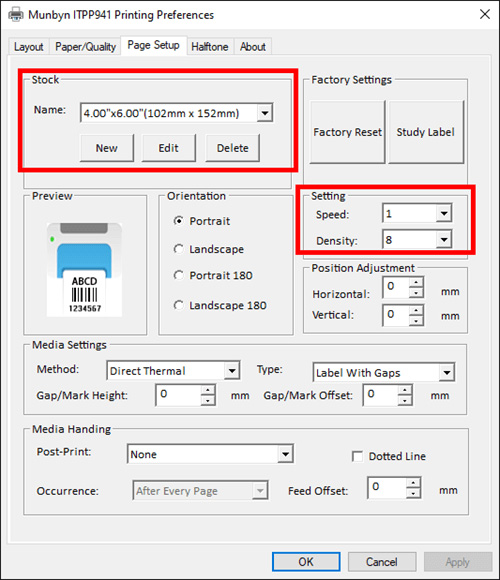
This is the review of the MUNBYN ITPP941 Thermal Label Printer and we are writing this review after properly testing it with shipping labels, stickers of different sizes. Read along to find out more about the same. What Do We Get? Let us quickly take a look at the contents of the package. A small note before diving into the contents. The MUNBYN ITPP941 Thermal Label Printer is available in three variations (Basic, Standard and Pro). We got the 941 Standard option. The reason we are mentioning this here is the contents of the packages of the three variations vary. Even the plug type and the color options are different. We will see more about the features in the next section. Coming to the package, it is a large red box made with good quality cardboard. Opening the box, we have the Thermal Printer itself. We got the white color printer. Initial impressions; it is really compact, small and lightweight. Next, we have the power cord and adapter. The adapter is rated for an output of 24V at 2A. Finally, there is another zip-lock bag with user manual, quick tip card and some thermal labels. The user manual is in English with very detailed screenshots of installation and settings. The thermal labels in the package are standard 4” x 6” size (which is commonly used by many popular commerce platforms as their shipping label size). If you press the ‘open’ button, the top cover releases from its latch and you can see the print head and also the place to insert the paper. There are two holders that hold the paper from either side. The position of the holders is adjustable and you have to adjust them as per the size (or width) of the thermal paper. On the back of the printer, there are two jacks; one for connecting the power and the other for connecting USB cable. There is also an on / off switch at the back. The supplied power cord and adapter are of good quality and make sure that you use only these. The power adapter is rated for 48W (24V at 2A). If you are a Mac user and your system doesn’t have USB-A ports, then you can use the provided USB-C to USB-A adapter as it is the only way to connect the printer to a system. Once the driver is installed, you are now ready to insert the paper and let the printer get familiar with it. To do that, lift up the top cover and insert the thermal paper facing up (the part that actually contains the print information must be up). Adjust the holder so that they hold the paper with just the right grip (not too tight or not too loose). Make sure that some part of the paper crosses the roller on the bottom. You can close the cover. After calibrating, we can now proceed to check the printer properties in the Windows system. The steps are very similar even in Mac system. You can refer to the user manual for instructions on accessing the printer properties in a Mac machine. In the Windows system where you installed the driver and connected the MUNBYN Thermal Printer, click on start button and open settings. In settings, click on ‘Devices’ and select ‘Printers &scanners’. Click on ‘Munbyn ITPP941’ and click on manage. Now, click on ‘Printing preferences’. This will open the printing preferences which are specific to the Munbyn ITPP941 Thermal Label Printer. In the ‘Print Setup’ tab, you can select the size of the label, speed of printing, density of the prints and many other settings. After setting the printer properly, you can print a self-test page by long pressing the printer activity button until you hear two beeps. Coming to the performance of the Munbyn Thermal Printer, it is perfect for printing shipping labels, Barcode Labels, Mailing Labels, Address Labels up to 4” x 6” size. The resolution of ITPP941 Standard (and Basic) variation is 203DPI (8 dots per mm). If you opt for Pro version, you get 300DPI resolution (12 dots per mm). All the three versions print at a rate of 150mm/s (or 6inch/s). The main advantage of MUNBYN ITPP941 Thermal Label Printer is you don’t need any ink or toner cartridges. All you need are a bunch or reel of proper Direct Thermal Papers. Also, Munbyn Thermal Label Printer comes with USB only interface. If you want to use with Wi-Fi, then you have to buy a special adapter from MUNBYN. It is sad that Wi-Fi connectivity is not provided as a default option. There is only one button on the printer to interact with it (the ‘open’ but just releases the cover latch). It has a bunch of functionalities and the bi-color LED embedded into the button indicates the status of the printer. Coming to LEDs, under normal working conditions, the green LED stays on. If the print head is over heated, then the green LED flashes every 1s and also the red LED flashes every 1s.The red flashes every 1s if the cover is not closed properly or in case of paper shortage. If there is a paper recognition error, then the red LED flashes. To do all these customizations, you have to open the ‘Printing preferences’ mentioned earlier and in the Stock section, you can create your own custom label size. Just right to that, you have the settings for adjusting the speed of the prints and also the density.
![]()
![]()

![]()
![]()

