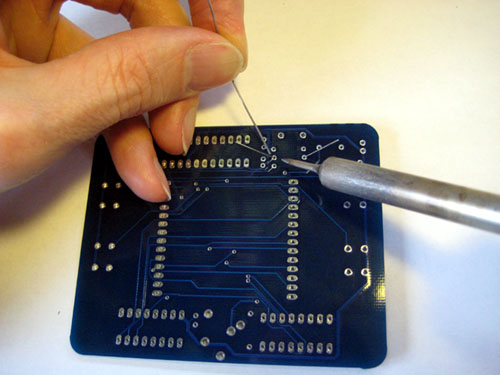
Soldering Techniques:
Following are the few important guidelines to be followed to get best results in soldering. Don’t handle bare wire with dirty hands. Wash the hands cleanly. There should be no grease, no oil. Make sure that the wires to be soldered are perfectly clean. Use a good conditioned soldering iron. If it is present in the bad condition, there would be no use at all to solder a good joint. Use liquid flux on the bare wire & terminal. Apply it with a small and clean brush wherever you want solder to stick. The bursh-in-bottle type is perfect. Use flux designed specifically for electronics which does not leave a residue after soldering. We have to use a PCB eraser to remove any film from the tracks. This should be done very carefully otherwise the film will prevent good soldering of the components to PCB. We may check the tracks using a magnifying glass. Sometimes we may repair the gaps in the tracks using wire but it is better to etch the new PCB. Place the PCB with its components in position in the bull clip. This will steady the PCB when you try to use the soldering iron. Use an appropriate wattage – 40 for larger wires and terminals, 25 for everything smaller. If you need a torch for electrical work, you need not solder. Patience is required while heating the iron. Never solder with a warm iron. Don’t use too much solder. You should never put a curve in a solder joint. The wire is always tinned straight. To solder two pieces of wire together, just place the tinned ends side by side and heat briefly. No additional solder is needed. It is better to keep a small bottle of alcohol and some q-tips and cotton swabs handy to clean the area afterwards. Eventhough it is not necessary to clean the residue after soldering, it would be professional. The liquid flux becomes sticky and whatever it drips on will hold dirt. Don’t use electrical tape for any reason on any solder joint. It will never work well. Don’t use a match or torch on heat shrink. Use a heat gun and use just enough heat. You don’t want the shrink tube to become brittle or to split. If a joint has sharp edges, smooth these before applying the shrink tube so the edge doesn’t work through the tube over time. After completion of the soldering process, the extended legs on the components need to be trimmed using wire clippers. The circuit is now ready for testing.
If you follow the above steps, you can easily get the required output. Comment * Name * Email * Website
Δ


![]()