Storing our data on various cloud services is not a new concept nowadays. We all want to protect our data and to prevent data loss, and we store it in the cloud. There are many cloud services that you can use, like Google Drive, Onedrive, iCloud, and much more. All of these services are great, but the only problem here is the storage limit. You get limited storage, like 2GB. If you want to increase this limit, then you have to pay for it. Now, if you want a cloud service that offers more space and has good security, then IDrive is your solution. IDrive is a cloud service that offers 5GB free cloud service to users. Of course, you can always increase this limit by paying for more storage.
How to Create an IDrive Account on Windows?
To create an IDrive account, firstly, go to the official website of IDrive on your browser by clicking here. You will see a Sign-Up option at the top of the home page of the site. Tap on the option to continue.
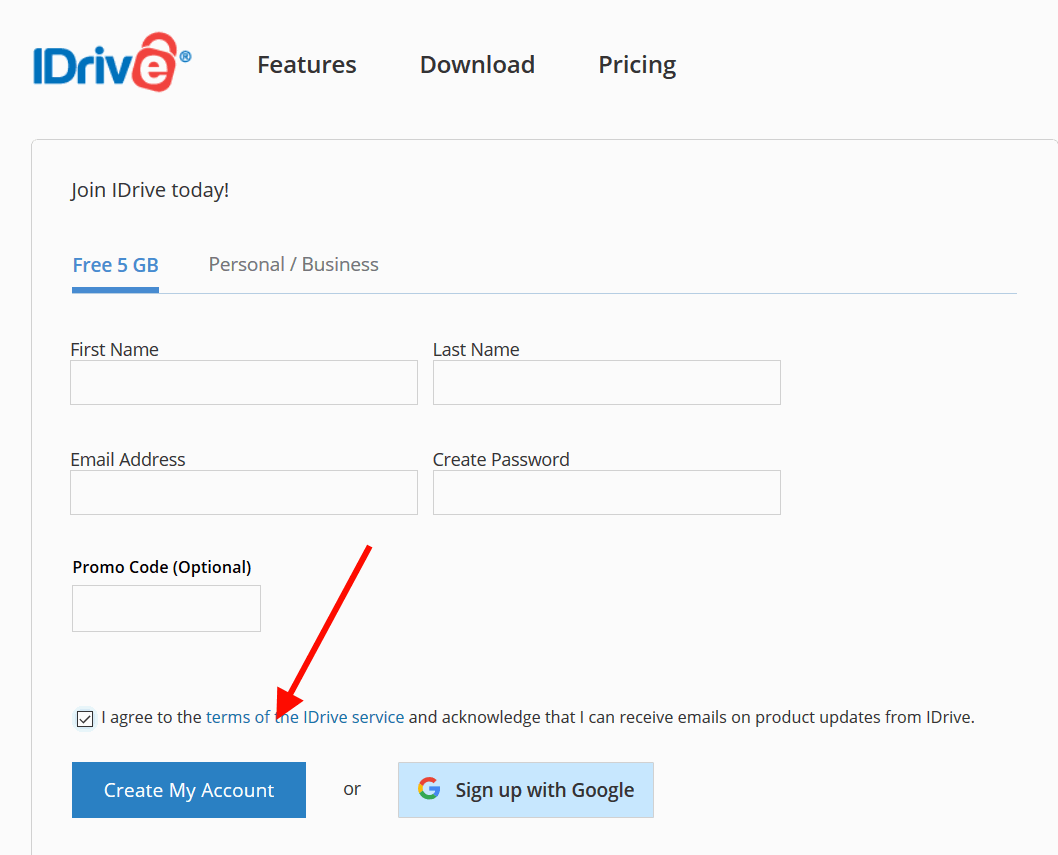
You need to fill in all the necessary details like your full name, your Email address, and create a password.
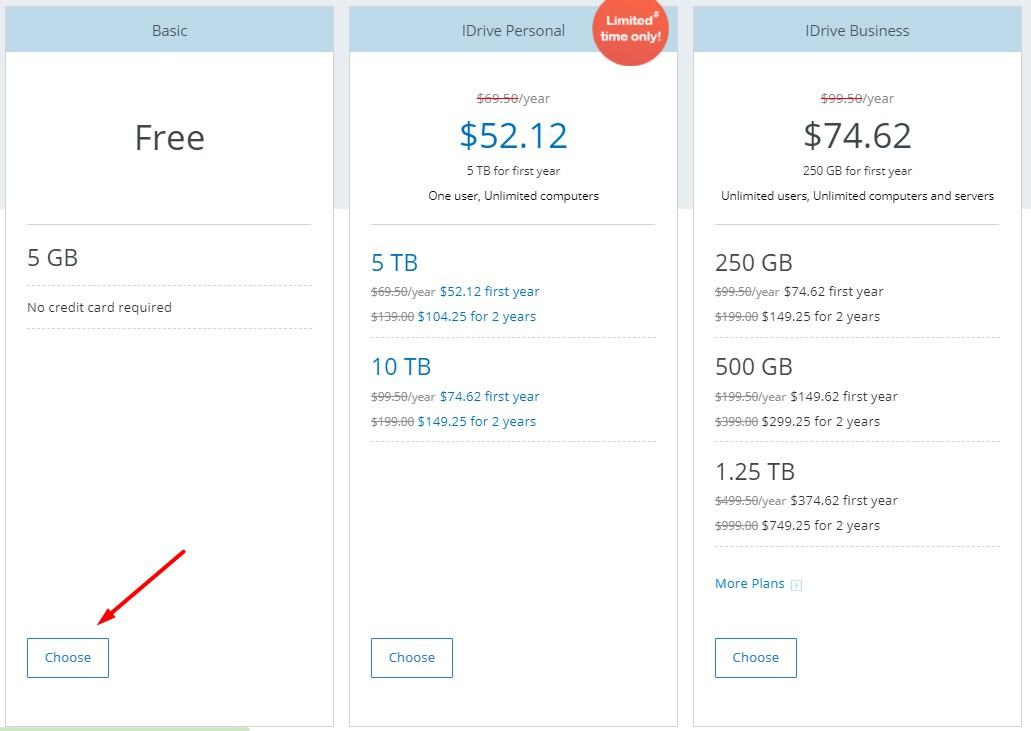
Here you have two options. The first one is the free 5GB account, and the other one is a personal or business premium account. The difference between these two is just like their name. In simple words, you will get a normal account with a 5GB cloud in the first option, and you can use the second option to directly purchase cloud storage according to your need. Note: you need to enter your phone number if you wish to use the second option and buy storage. The phone number is required for purchase because of the verification process.
After choosing the option according to your need and filling in all the details, check on the terms and condition checkbox and tap on Create my account. If you want to open your account with the help of your Gmail login, then you can do so by clicking on the “Sign up with Google” button. it will fetch all your details and make you a new account instantly.
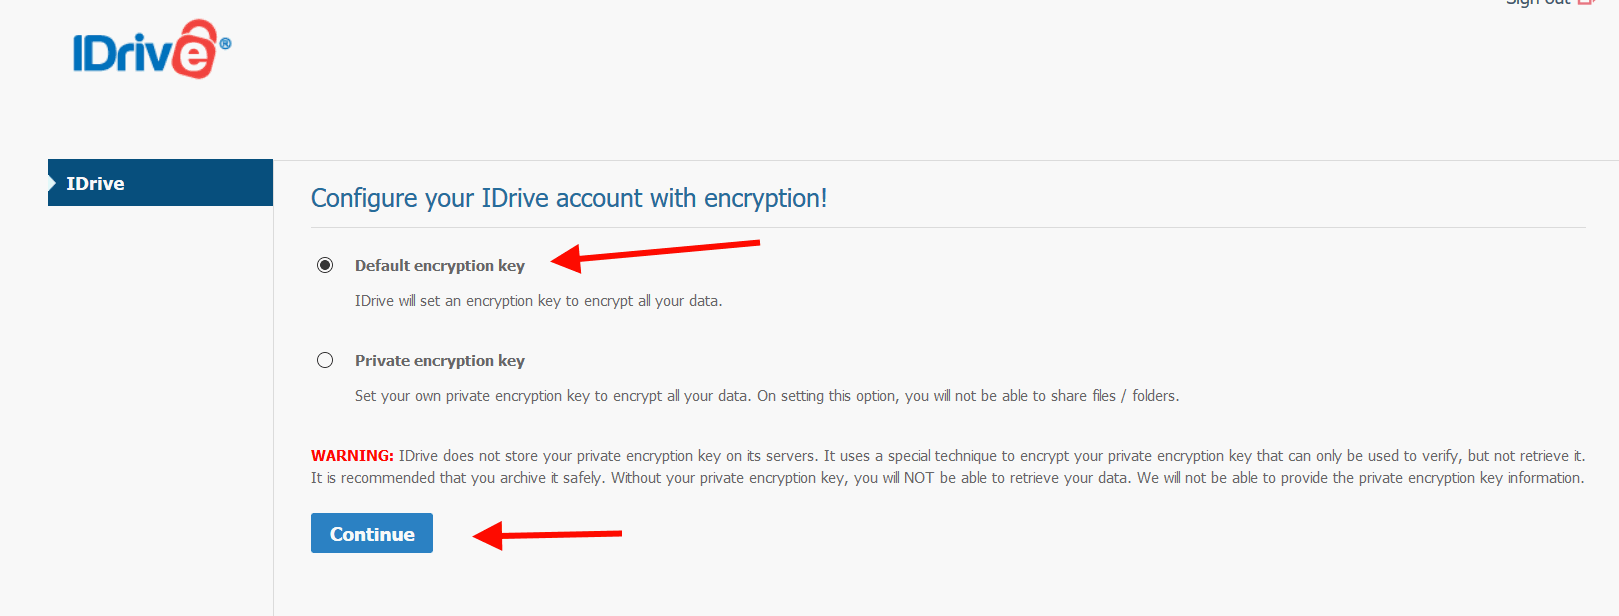
After that, you will see an option about the encryption key that will protect your data. Here you can create an encryption key of your choice or process it with the default key. Click on continue to proceed.
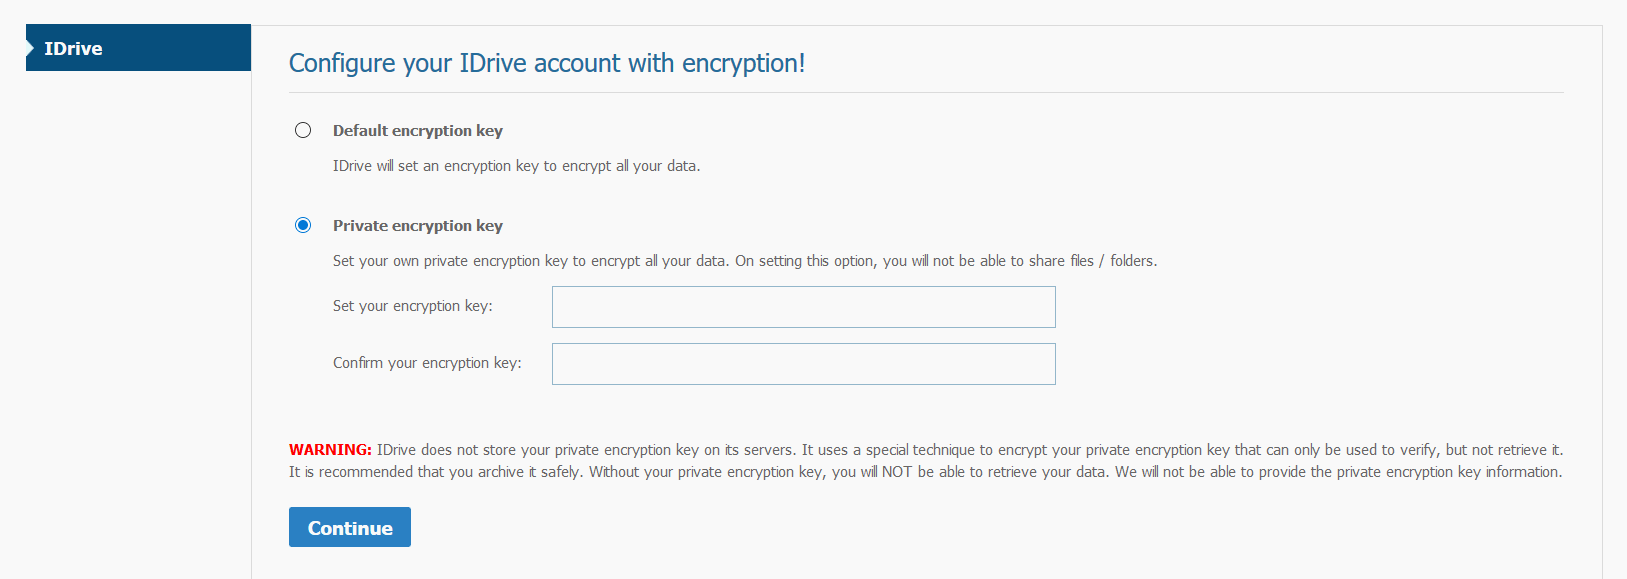
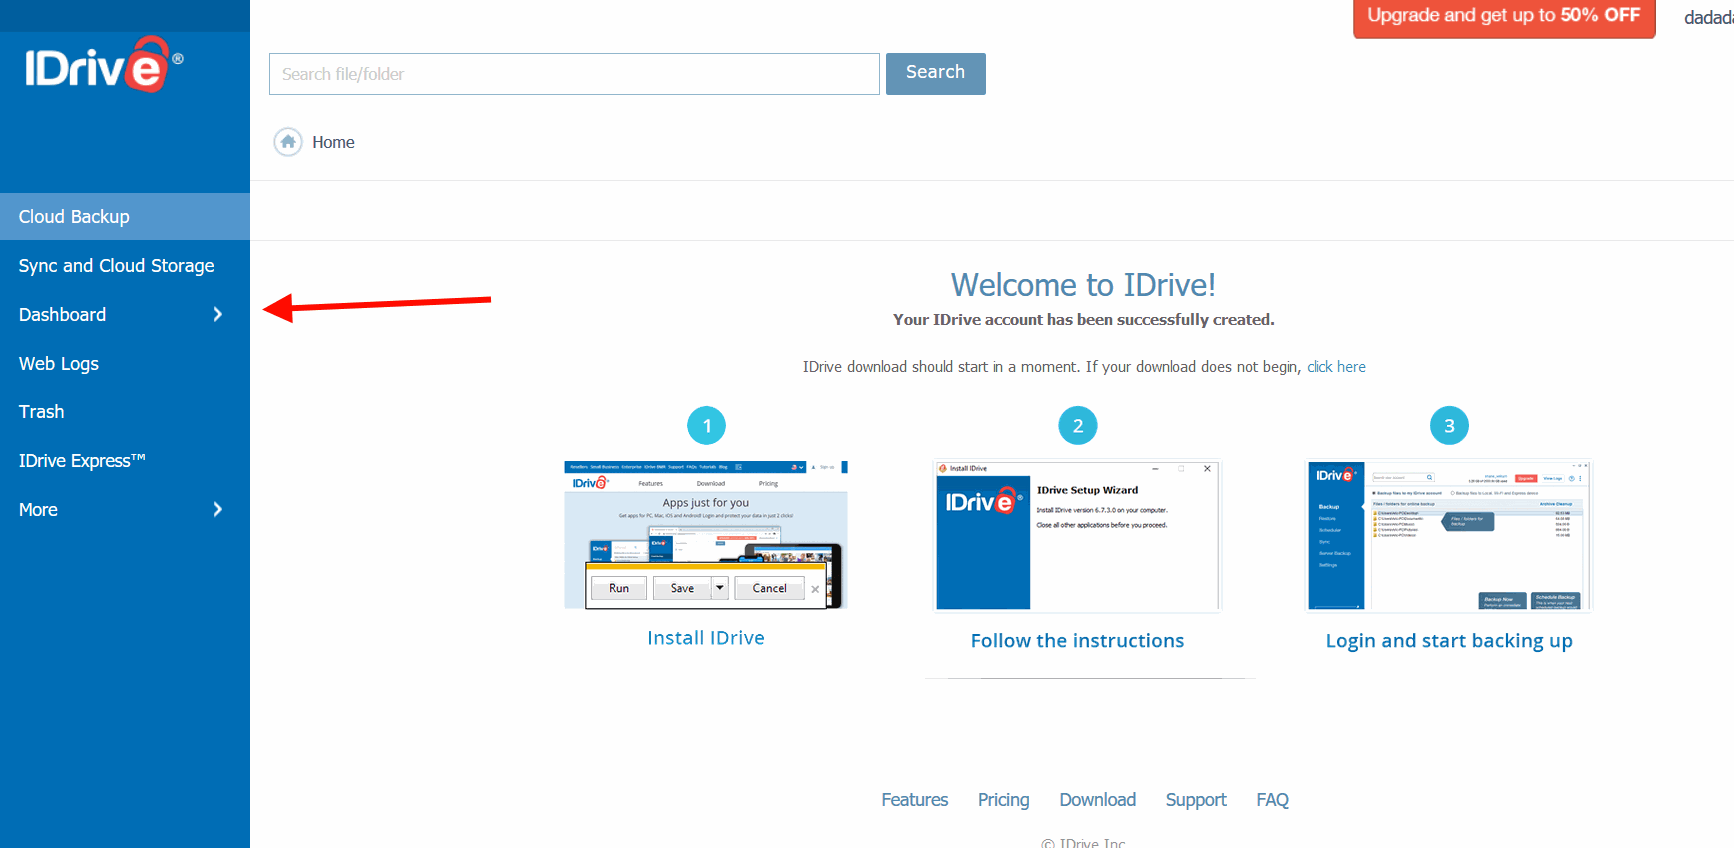
Note: If you’re a beginner then I recommend you to use the default encryption key to keep things simples and easy to handle. Otherwise, you can opt for a private encryption key as per your convenience. That’s all now, and you will be redirected to your account. On the homepage of your account, you will see a welcome message.
Now you can go to the Dashboard and upload your files if necessary. You can go to Sync and cloud storage to set up features like automatic file sync. Note: You can download the official app for your windows from the same page. You will see a ‘Click here to download’ option click on that and click on the download IDrive option to start your download.
Conclusion
To sum up, you can create the IDrive account using your windows by following the method mentioned above. If you choose to use custom encryption, keynote it down as it is a must needed thing to restore your backup on the IDrive. You will lose your data if you lose your encryption key. That’s all for this article. I hope it helps you in creating your IDrive account in windows.